Categories
Archives
- September 2010
- August 2010
- July 2010
- June 2010
- May 2010
- April 2010
- December 2009
- October 2009
- February 2009
- January 2009
- December 2008
- November 2008
- October 2008
- August 2008
- July 2008
- June 2008
- May 2008
- April 2008
- March 2008
- February 2008
- January 2008
- December 2007
- November 2007
- October 2007
- September 2007
- August 2007
- July 2007
- June 2007
- May 2007
- April 2007
- March 2007
- February 2007
- January 2007
- December 2006
- November 2006
- October 2006
- September 2006
Meta
Article: Sorting and Grouping data with DomainDataSource in Silverlight 4.0
My article focusing on all the features of sorting and grouping using DomainDataSource got published here:
Silverlight 4.0: Sorting and Grouping Data with DomainDataSource
thanks
Jag
Article: Working with Query Parameters of DomainDataSource using Silverlight 4
My next article focusing on working with Query Parameters of DoaminDataSource got published here:
Silverlight 4.0: Query Parameters of DomainDataSource – A Second Glance
thanks
Jag
Article: Understanding DomainDataSource in Silverlight 4.0
Hi,
My article explaining about DomainDataSource in Silverlight 4.0 got published here:
Silverlight 4.0: DomainDataSource
thanks
Jag
Quick learn SharePoint 2010 – Part 6: How to delete a site from Site Collection
This series is mainly targeted for developers.
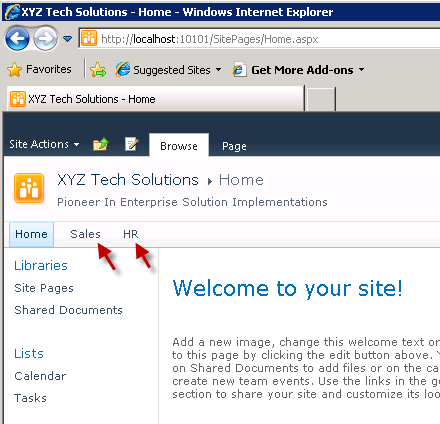
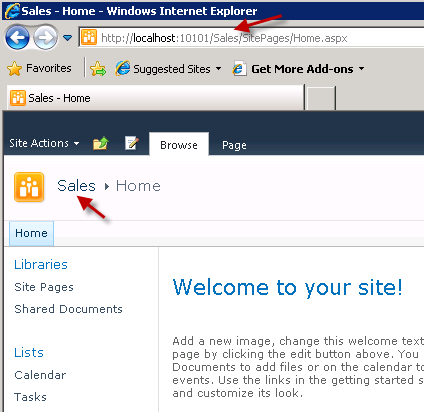
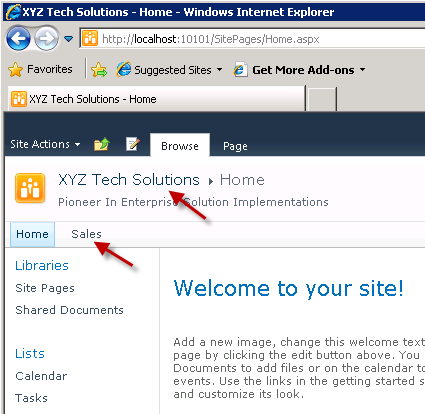
- Open site collection in browser. In may case, it shows two sites as shown below
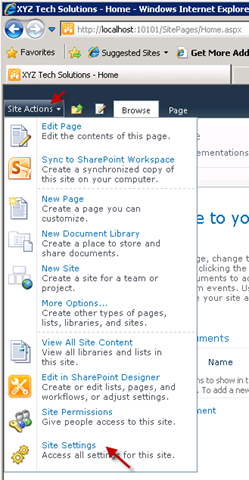
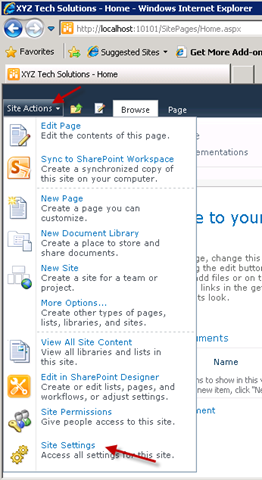
- Go to “Site Actions –> Site Settings” as shown below
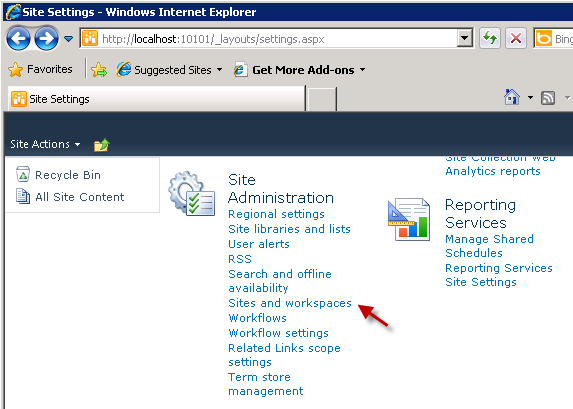
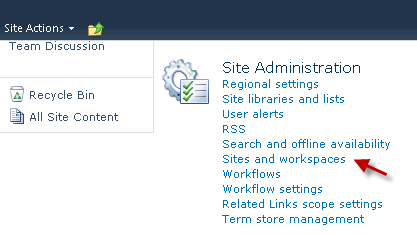
- Select “Sites and workspaces” under “Site Administration” as shown below
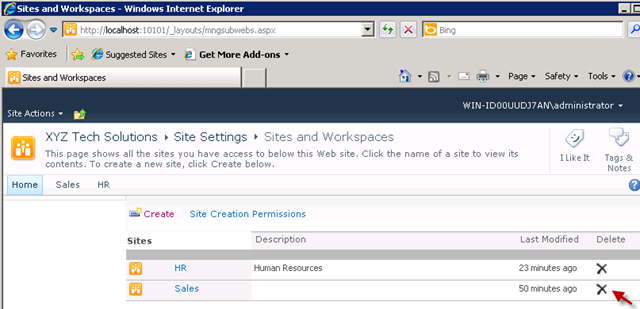
- You can click “Delete” icon for the respective site as shown below:
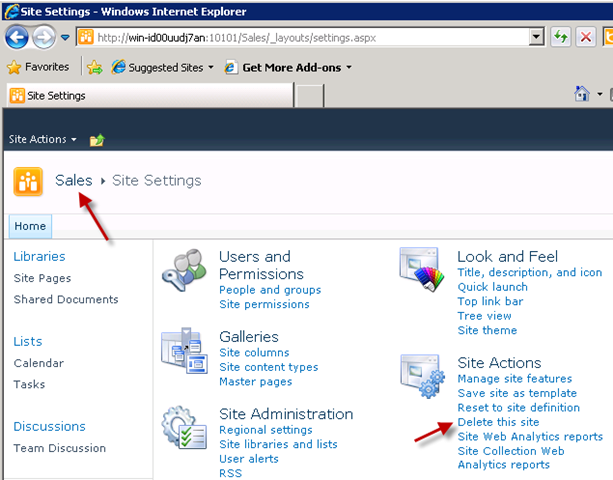
You can also directly delete a site by going to that site first and then open site settings. Once the site settings is open, you should be able to see “Delete this site” option as shown below:
The above approach is same for deleting sub-sites as well.
thanks
Jag
Quick learn SharePoint 2010 – Part 5: How to create sites/subsites in a Site Collection
This series is mainly targeted for developers.
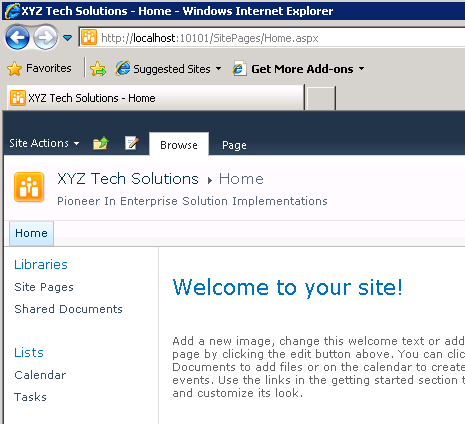
- Open site collection in browser. If you are following from previous articles, it would look like the following
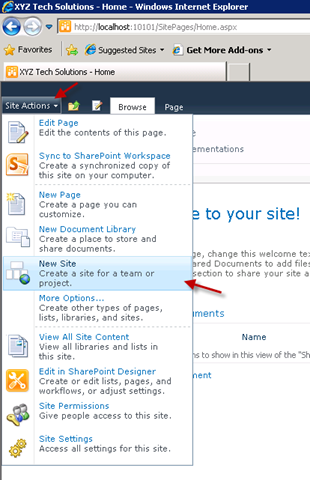
- Go to Site Actions –> New Site as shown below
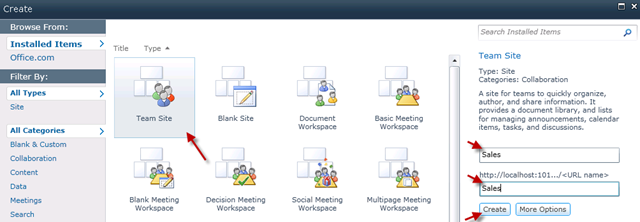
- Select a template (in this case, “Team Site”), provide name and URL and finally click on “Create” (you can customize more using “More Options” button)
- The site gets created and it looks something like the following
- If you go back to Site Collection, you should also site as shown below:
You can follow the same above method for creating sub-sites, except that you would start with site instead of site-collection. Most of the options available for “Site Collection” would also be available for “Site”.
Second Approach:
We can also achieve similar to above using a different approach
- go to Site Actions –> Site Settings as shown below
- Under “Site Administration”, select “Sites and Workspaces”
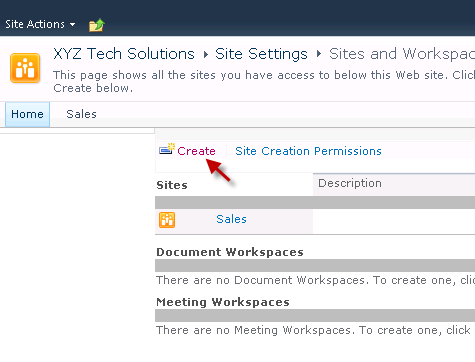
- You can click on “Create” at the top
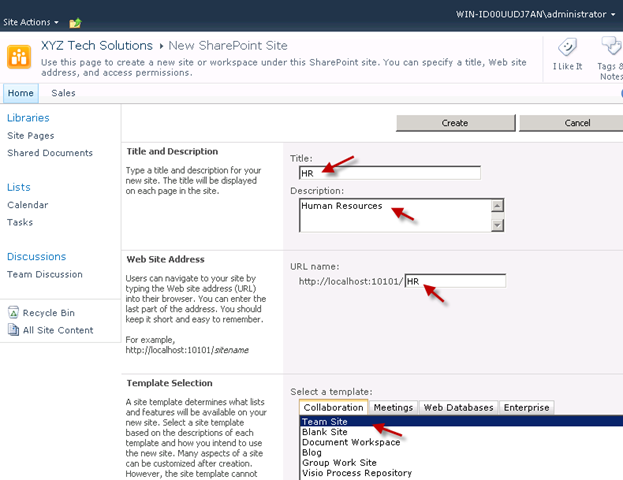
- Provide site details as necessary
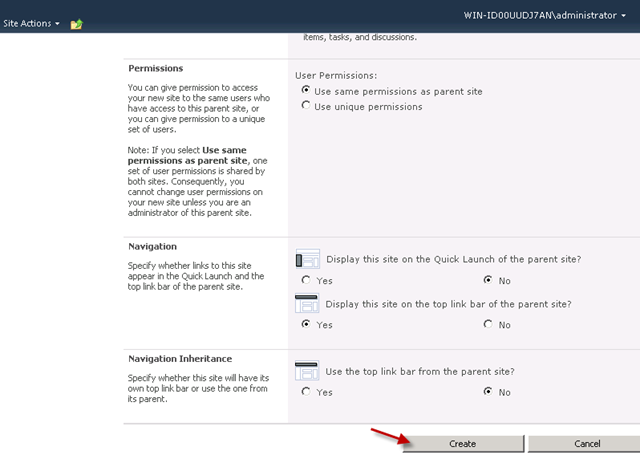
- Customize as necessary and click on “Create”
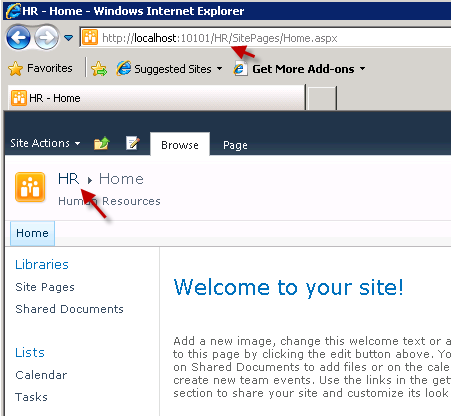
- Once created, you should see new “HR” site as shown below
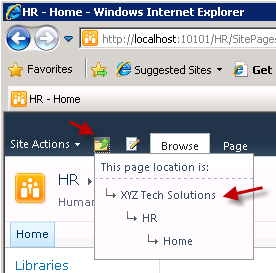
- You can use “up” button to go through different site hierarchies
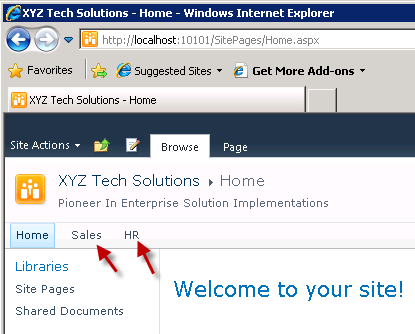
- Once you move back to “Site collection” home, you should see both sites available from home page of site collection as shown below
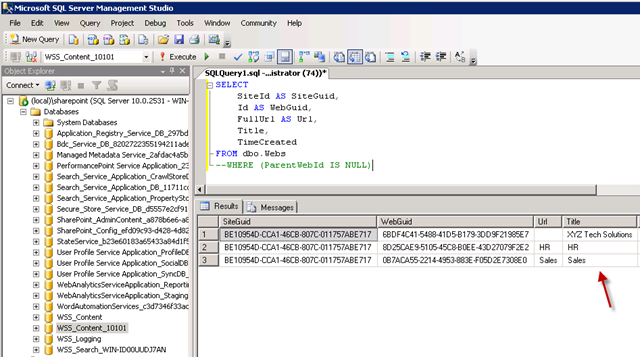
- You can also check the above sites in database as shown below
SELECT
SiteId AS SiteGuid,
Id AS WebGuid,
FullUrl AS Url,
Title,
TimeCreated
FROM dbo.Webs
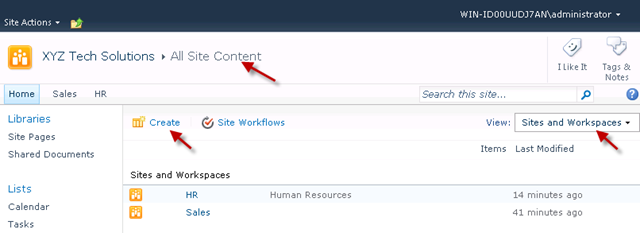
Another approach is to go to “Site Actions –> View All Site Content” and filter “View” with “Sites and Workspaces” and click on “Create” at the top as shown below:
thanks
Jag
Quick learn SharePoint 2010 – Part 4: How to delete a Site Collection in SharePoint 2010
This series is mainly targeted for developers.
- Open “SharePoint 2010 Central Administration”
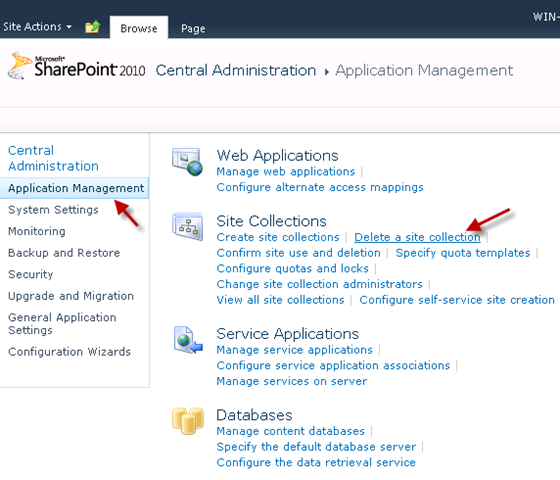
- Select “Application Management” from the left menu panel and click on “Delete a site collection” as shown below
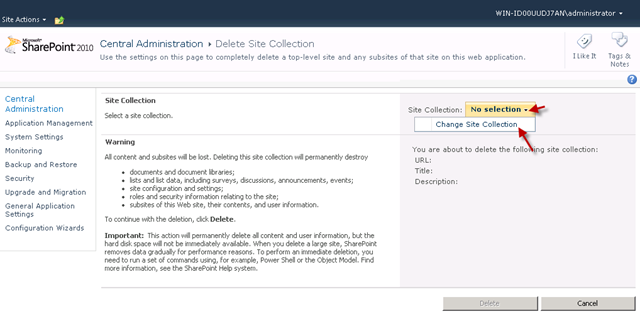
- You need to select site collection to perform delete. select “Change Site Collection” from the drop menu as shown below
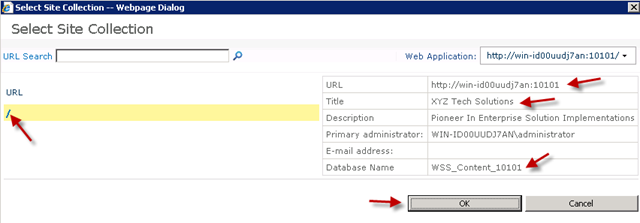
- I hosted my site collection at the root of SharePoint web application (and not in "/Sites/”). Click on “/” (root) to show site collection details. Click “Ok” to select.
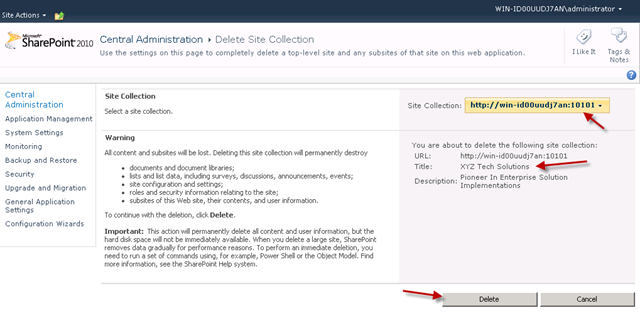
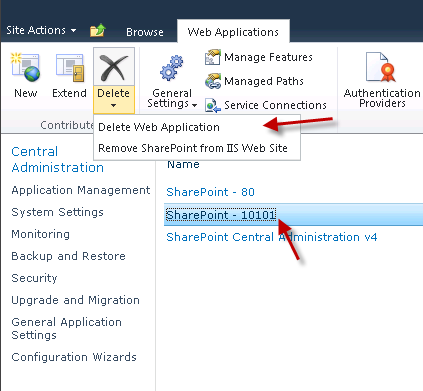
- Once the selection is made, click on “Delete” to delete site collection from web application.
thanks
Jag
Quick learn SharePoint 2010 – Part 3: How to create a Site Collection in SharePoint 2010
This series is mainly targeted for developers.
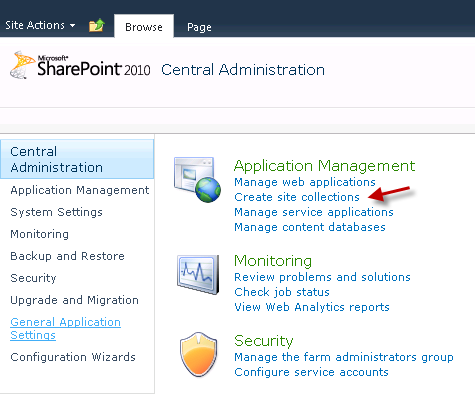
- Open “SharePoint 2010 Central Administration”
- Select “Create Site Collections” as shown below
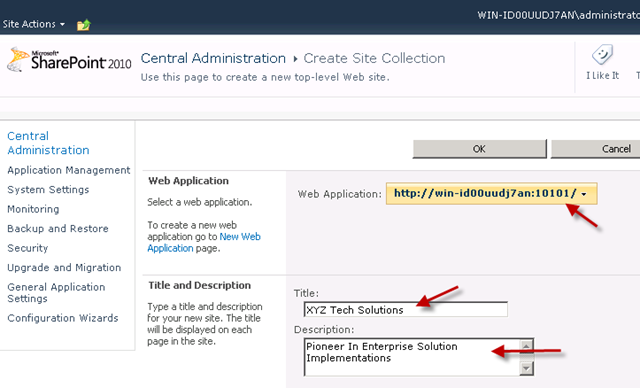
- Customize as necessary
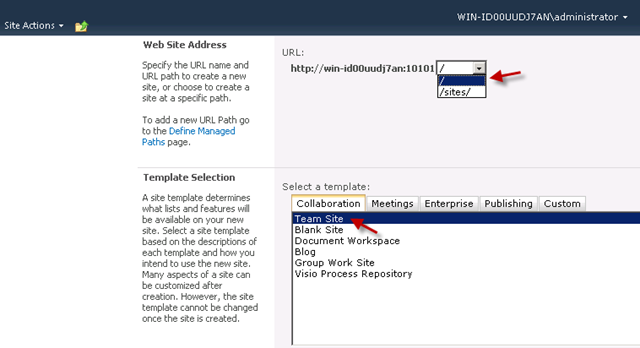
- In the following screen, select “/” if you want site collection to be hosted at root of web application (usually, this is selected when we want only one site collection to be created). Select “/sites/”, if you want site collection to be hosted at “SharePointWebAppRoot/sites/” (you would need this if you want multiple site collections to be created as part of the same web application). I select “/” to host site collection at root of web application.
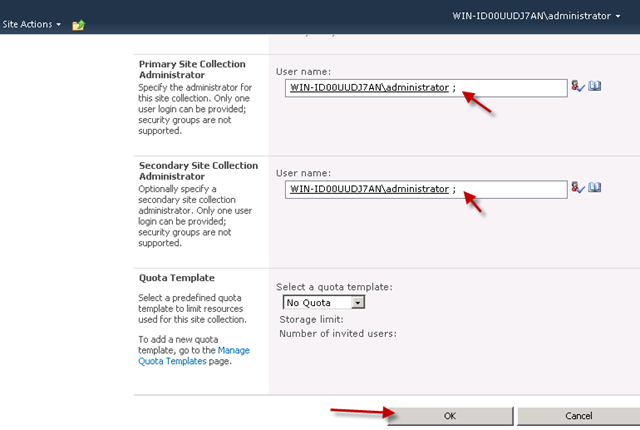
- type user name and click on “check names” button to ensure that the user name is valid
- Provide security and click on “Ok”
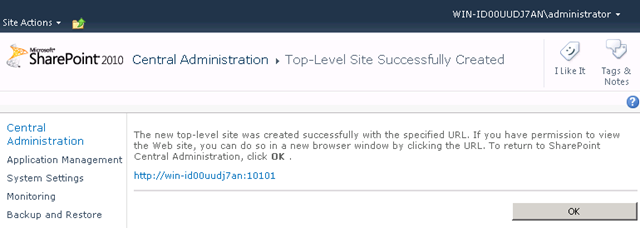
- The site collection gets created
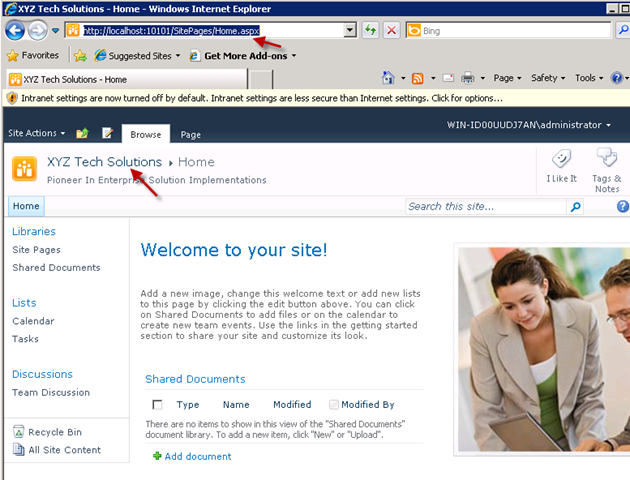
- As I created site collection at root of web application (listening at port 10101), you can directly access it using “http://SharePointServerName:10101” and you should see the screen as follows:
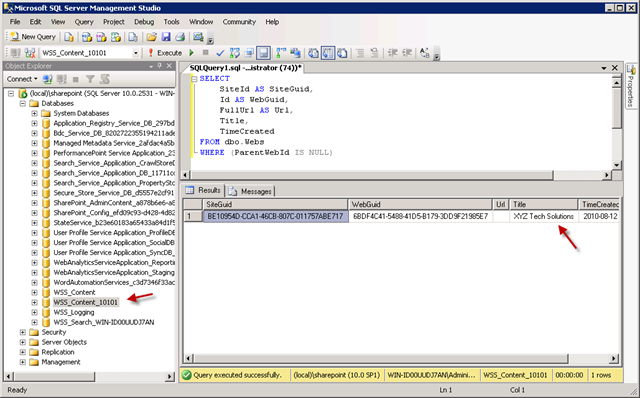
- You can also check the site collection details in database as shown below:
SELECT
SiteId AS SiteGuid,
Id AS WebGuid,
FullUrl AS Url,
Title,
TimeCreated
FROM dbo.Webs
WHERE (ParentWebId IS NULL)
thanks
Jag
Quick learn SharePoint 2010 – Part 1: How to create a new Web Application using SharePoint 2010
This series is mainly targeted for developers.
I use a virtual machine installed with following software (in the same order) for this series:
- Microsoft Windows Server 2008 R2
- Microsoft SQL Server 2008 R2
- Microsoft SharePoint Server 2010
- Microsoft Visual Studio 2010 Ultimate
- Microsoft Office 2010 Professional Plus (and Power Pivot for Excel)
The beginning – How to create a new Web Application using SharePoint 2010
- Open Start menu and select “SharePoint 2010 Central Administration” and provide necessary credentials to log-in
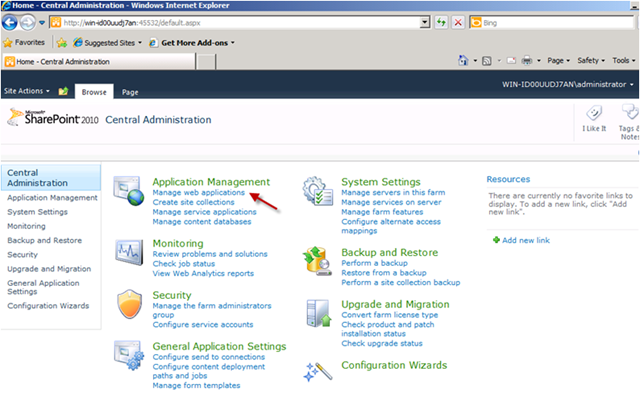
- Under “Application Management” section, click on “Manage Web Applications”
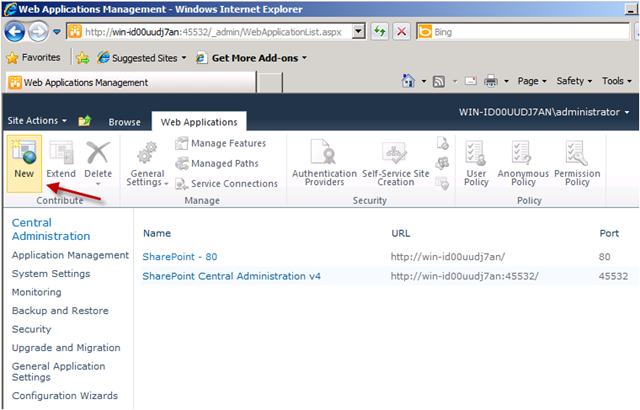
- click “New” on the ribbon.
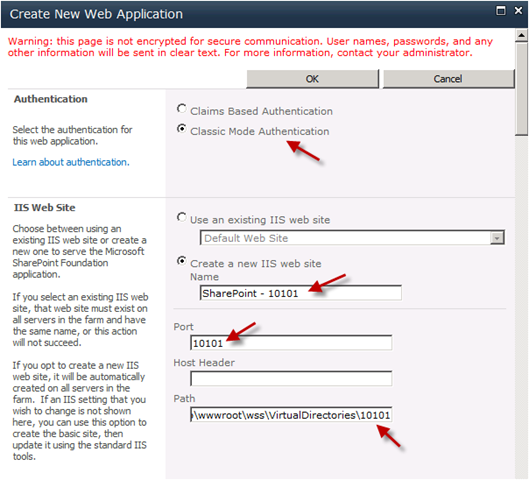
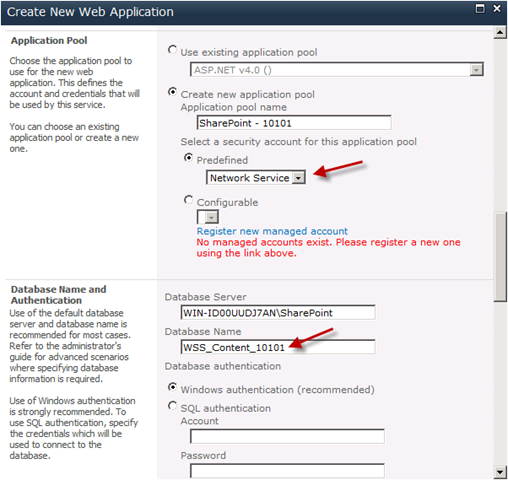
- Provide authentication mode, name, port number and physical web path
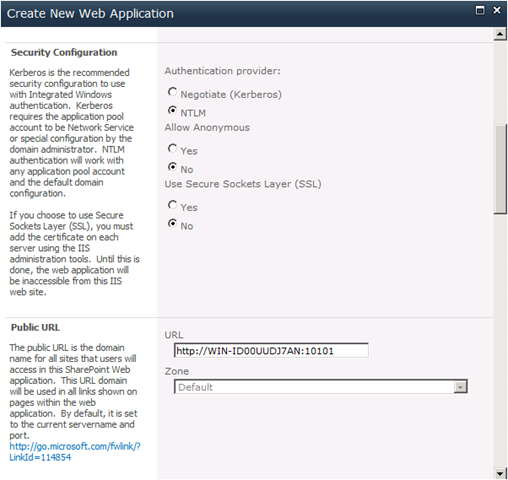
- customize if necessary.
- For now, I selected “Network Service” to be the security for the new application pool. I wanted to have my SharePoint web application to sit in its own Application Pool.
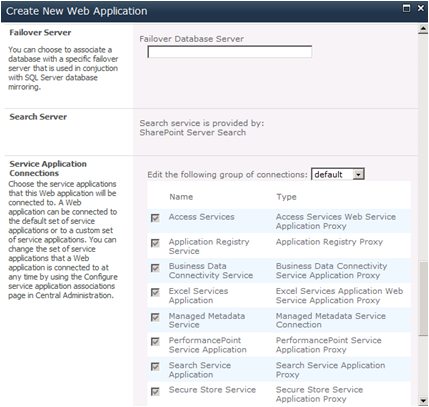
- Customize if necessary.
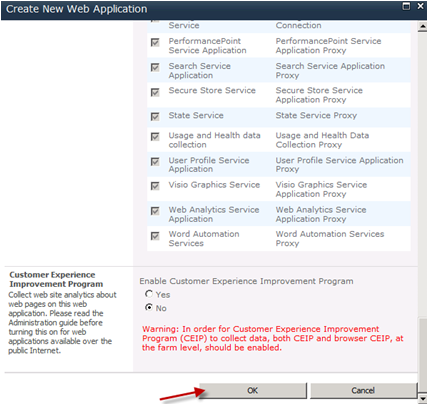
- Customize if necessary and finally click on “Ok”.
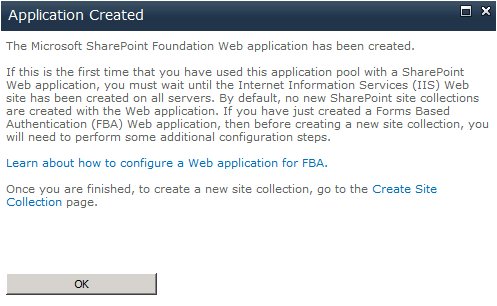
- Your web application should be created momentarily. You can start creating SharePoint Site Collections once the web application is created.
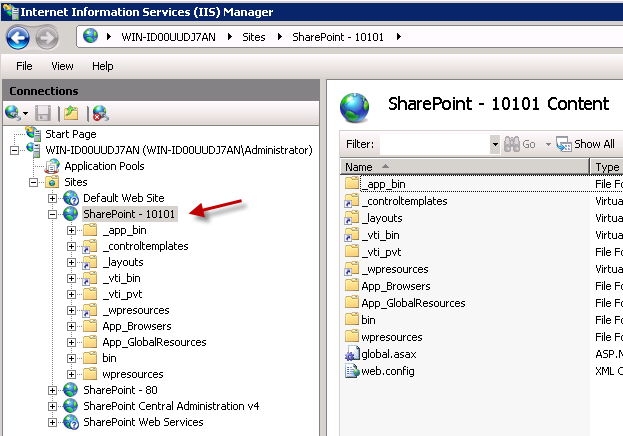
- Once the web application is created, it should reflect in IIS as shown below:
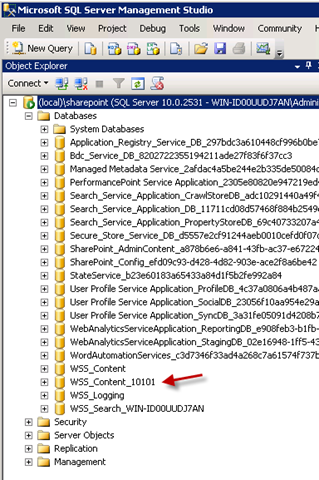
- You should also be able to see a new database created for the above web application as shown below:
thanks
Jag

